How to Add Polkadot (DOT) to MetaMask Wallet: Full Guide
- by Toby Foster
- Published 59 days ago
- 5 mins read
Are you a crypto enthusiast with a thriving MetaMask portfolio, or are you looking to create one? Have you heard of an attractive DOT token, and now you want to learn how to add Polkadot to MetaMask?
You’ve come to the right place, as we’re going to delve deep into the intricacies of the Polkadot blockchain, its features, and its MetaMask wallet compatibility. After all, while MetaMask is known as the Ethereum powerhouse in the world of cryptocurrencies, Polkadot is a completely different ecosystem.
Still, if there’s one thing the cryptosphere is known for, it’s the flexibility and opportunity to “patch things up,” bridge tokens from one network to another, and achieve cross-network interoperability. So, let’s figure out whether you can add Polkadot to MetaMask and how you should go about it.
Can You Add Polkadot to MetaMask?
You can’t add Polkadot to MetaMask. MetaMask is an Ethereum-based wallet, while Polkadot is a completely separate network that’s incompatible with the Ethereum Virtual Machine.
While the MetaMask wallet supports various networks, they all need to be EVM-compatible, and dApps for them need to be written in Solidity. On the other hand, Polkadot uses a framework called Substrate, and dApps built on it can be written in various other programming languages, including JavaScript and Rust.
Even though Polkadot was created by Gavin Wood, a computer scientist who also co-founded Ethereum, there are currently no plans to make Polkadot compatible with MetaMask. Instead, users who want to participate in this network and utilize DOT tokens are incentivized to use other wallets, such as Polkawallet, PolkaGate, and SubWallet.
The downside of using these wallets is the inability to take part in Ethereum’s thriving DeFi ecosystem of decentralized exchanges, NFT marketplaces, and more. Fortunately, there is a workaround, and it involves sending wrapped DOT tokens to MetaMask.
How to Add Binance Smart Chain to MetaMask
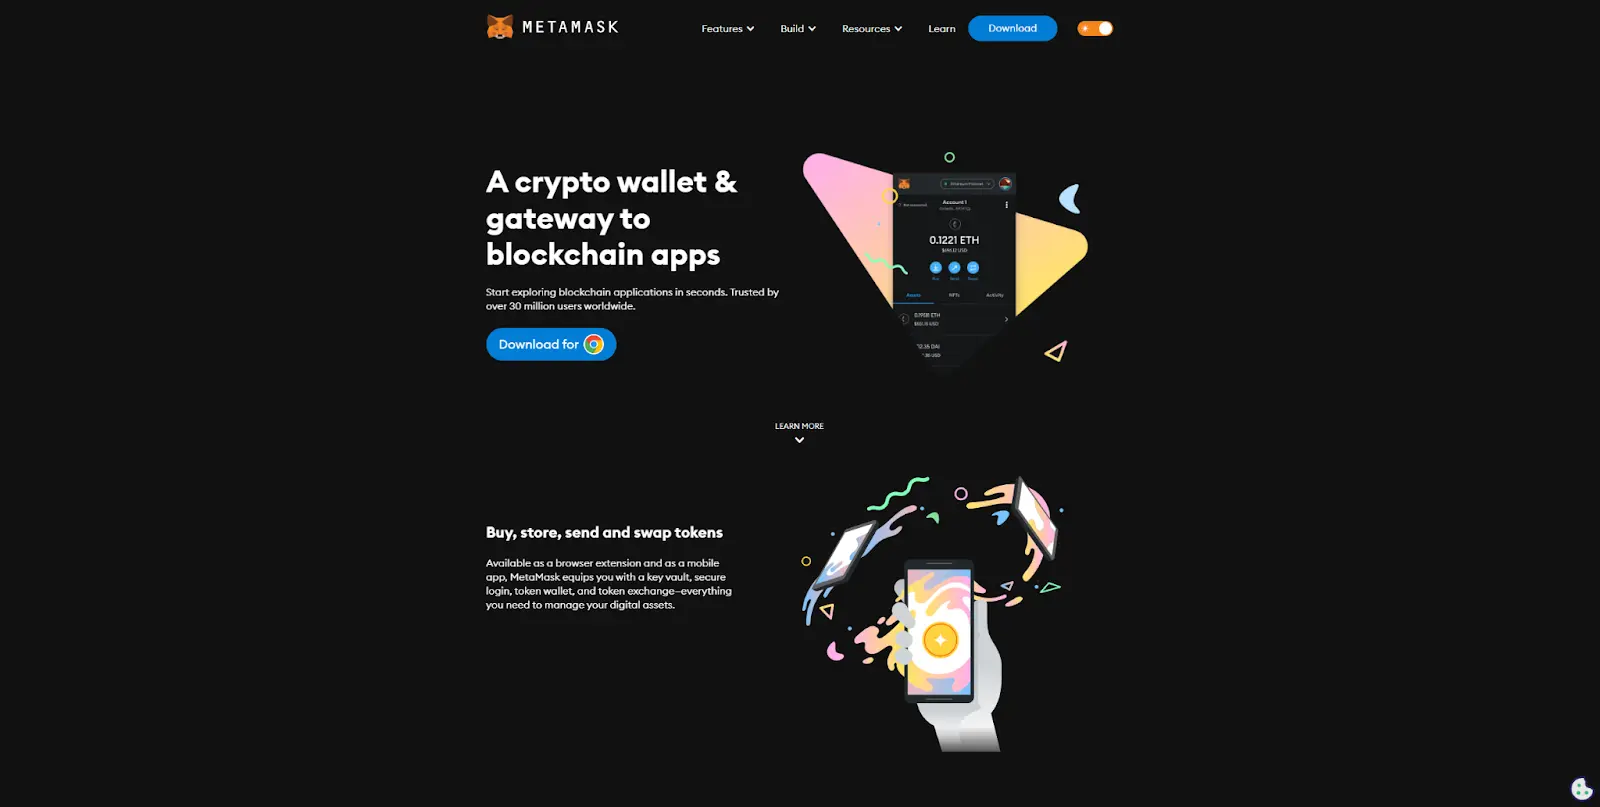
One of the easiest ways to send wrapped DOT to MetaMask is by using the Binance Smart Chain (BSC). To do that, you first need to add Binance Smart Chain to MetaMask, and then you can use BEP2 and BEP20 versions of DOT.
By default, your MetaMask wallet is configured to use the Ethereum mainnet. Here’s a step-by-step guide on how to set it up and connect it to the Binance Smart Chain:
- Head to the official MetaMask website and download a browser extension or mobile version.
- Install the wallet and follow the setup process. Make sure to carefully write down a backup seed phrase before storing it securely.
- Go to the “Settings” page and select the “Networks” section from the sidebar.
- Input the following details for the BSC mainnet (not to be confused with the testnet, which has different details):
- Network Name: Smart Chain
- New RPC URL: https://bsc-dataseed.binance.org/
- ChainID: 56
- Symbol (optional): BNB
- Block Explorer URL (optional):https://bscscan.com
- Click «Save.”
You can now head back to the main page of your MetaMask wallet. You’ll find the network selector in the top navigation bar, where you’ll be able to switch to the Binance Smart Chain network.
How to Add Polkadot to MetaMask
Now that we have a wallet installed, we can finally figure out how to add Polkadot to MetaMask. The process is simple and, in many ways, similar to adding any other token to MetaMask, with a few additional steps.
Let’s learn how to add Polkadot (DOT) to MetaMask using the example of a centralized exchange such as Binance. Here’s a step-by-step guide:
1. Obtain DOT tokens by purchasing them with fiat or exchanging other cryptocurrencies for them.
2. Head to the wallet the exchange has provided you with and find your DOT holdings.
3. Initiate the withdrawal process and include the number of tokens you want to transfer.
4. Go to your MetaMask wallet, copy your DOT address, and paste it as a recipient address in the exchange’s withdrawal window.
5. Select the transfer network to ensure that you’re sending a compatible DOT-pegged token to the BSC address in your MetaMask wallet. Here’s what that looks like in practice:
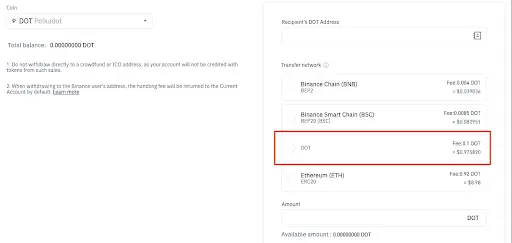
6. Confirm the transfer and wait for the tokens to arrive in your wallet. The process shouldn’t last more than a few minutes.
One way to confirm whether you’ve sent the correct version of DOT to MetaMask is by checking the address. Polkadot’s native addresses start with 1 or 5, while Ethereum-compatible addresses (including BSC addresses) always start with 0x.
Lastly, if you’ve sent the wrong version of DOT tokens to your MetaMask wallet, you might be able to get them back by contacting the exchange’s support. Still, that is not a guarantee, and sending tokens to the wrong network can result in an irreversible loss of funds!
What is a Polkadot Wallet?
A Polkadot wallet is purpose-built software designed to help users safeguard and manage their tokens. The multichain nature of the Polkadot network makes it essential to pick a proper wallet since only then will you be able to take full advantage of this ecosystem.
There are two types of crypto wallets:
- Hot wallets, which come in the form of mobile apps and browser extensions and usually store your keys online
- Cold wallets, which keep your private keys offline on a hardware device
Exchanges can also be considered hot wallets, as they give you easy access to your DOT tokens and allow you to effortlessly buy, trade, and send them. However, they often aren’t the best solution since you’re giving your private keys to a third party under the promise that they’ll give them to you when asked. This concept is called a “custodial wallet.”
For enhanced security and utility, users should keep their private keys to themselves by using non-custodial wallets.
Here are some of the most popular browser extension Polkadot wallets that are non-custodial:
- PolkaGate, whichallows Polkadot staking, crowdloans, and governance and integrates with Ledger.
- Enkrypt, whichdoesn’t offer staking features, but it supports NFTs, and its code is open-source.
- SubWallet, whichsupports more than 150 networks, along with staking, NFTs, and crowdfunding, while also integrating with Ledger.
If you’re looking for a mobile wallet, these are good choices:
- Fearless Wallet, as it allows for staking and crowdloans while also giving users easy access to Web3
- Nova Wallet, which is a feature-packed mobile wallet that supports parachain governance, agile delegations, staking, NFTs, Ledger integration, and much more
- SubWallet, which comes in both browser extensions and mobile versions for increased versatility and multi-device cryptocurrency management
Key Takeaways
That concludes today’s lesson on the puzzle, which is how to add Polkadot to MetaMask. As you can see, Polkadot is a strong contender in the booming world of cryptocurrencies, and utilizing its network of chains to its full extent generally requires a specialized wallet.
Regardless, it’s still possible to add a pegged Polkadot token to MetaMask and get the best of both worlds. On the one hand, you’ll be using one of the most popular and versatile Ethereum-based wallets in the cryptosphere.
On the other hand, you’ll be able to leverage your DOT holdings to participate in various DeFi protocols. Don’t forget to DYOR, and good luck with your investing!
How to Add Polkadot to MetaMask FAQ
Does MetaMask hold Polkadot?
MetaMask does not hold Polkadot natively and doesn’t support its token, DOT. However, it can integrate other networks, such as Binance Smart Chain, which support tokenized versions of DOT. That means MetaMask can hold Binance-pegged DOT and use it to participate in Ethereum’s DeFi ecosystem.
How do I connect my wallet to Polkadot?
How you connect your wallet to Polkadot depends on which one you choose. Browser extension wallets are some of the easiest wallets to set up. You can connect them to Polkadot by downloading the extension, creating an account, memorizing your password and seed phrase, and finally adding the account.
Does Polkadot have a wallet?
There are several wallets that support Polkadot and its network of blockchains. Browser extension wallets include PolkaGate and Enkrypt, while Fearless Wallet and Nova Wallet are some of the popular mobile versions.
Как добавить сеть полкадот в метамаск
От admin Июл 17, 2023
MetaMask работает с криптовалютами, основанными на EVM (Ethereum Virtual Machine), и поэтому не совместим с блокчейном Polkadot, который не использует EVM. Это означает, что сеть Polkadot невозможно добавить в MetaMask.
Для работы с блокчейнами, не основанными на EVM, понадобится другой кошелек. Если вы хотите взаимодействовать с сетью Polkadot через кошелек аналогичный MetaMask, рассмотрите следующие популярные альтернативы:
- Polkadot-js: Официальный кошелек Polkadot. Для его использования достаточно просто ввести «polkadot.js» в поисковике и установить расширение для браузера. После установки вы найдете значок Polkadot среди расширений браузера и сможете создать новый кошелек, нажав на значок и затем на кнопку «+».
- Trust Wallet: Децентрализованный мультивалютный кошелек, который предлагает полный контроль над цифровыми активами пользователя, включая криптовалюты и NFT. Trust Wallet, официальный кошелек Binance, поддерживает 65 блокчейнов и более 4,5 миллиона криптоактивов. Это онлайн-кошелек, к которому можно получить доступ через защищенное соединение при наличии интернета.
- Atomic Wallet: Этот децентрализованный криптовалютный кошелек доступен для множества платформ, включая Windows, macOS, Android, iOS и некоторые Linux-системы. Кошелек поддерживает более 300 криптовалют, и его можно загрузить с сайта atomicwallet.io. После установки кошелька вы сможете добавить Polkadot и совершать транзакции.
Add Polkadot to MetaMask
Learn why you can’t add Polkadot to MetaMask and the role of Polkawallet as a trusted alternative.

Jed Barker
Editor-in-Chief
Last Updated
August 6, 2023
Fact Checked
Share With
Or share with link
Thank you! Your submission has been received!
Oops! Something went wrong while submitting the form.
Link copied to clipboard
Summary: Adding Polkadot into MetaMask isn’t achievable because of Polkadot’s distinct blockchain framework, which isn’t compatible with Ethereum-centric wallets. A practical substitute is the Polkawallet, a trusted and user-friendly wallet supported by significant entities like Web3 Foundation. Following a straightforward installation procedure, Polkawallet automatically connects with the Polkadot Relay Chain for instant use.
Content Guide
Daily Newsletter & Research ��️
Get the daily newsletter keeping 200,000 investors ahead of the market.
Your email been received!
Please double check your email address.
Can You Add Polkadot to MetaMask?
Adding Polkadot to MetaMask isn’t possible due to Polkadot’s unique base technology. Polkadot operates on its own blockchain, the Polkadot Relay Chain, not the Ethereum Virtual Machine (EVM). Its consensus mechanism, Nominated Proof-of-Stake (NPoS), significantly differs from Ethereum’s. This key difference means Polkadot can’t interface with wallets mainly designed for Ethereum tokens, such as MetaMask.
How to Set Up a MetaMask Alternative for Polkadot

The Polkawallet serves as a suitable alternative to MetaMask, offering a user-friendly interface similar to well-known wallets like MetaMask and Coinbase Wallet. Once installed, Polkawallet automatically connects with the Polkadot Relay Chain, allowing you to deposit funds into your wallet and begin interacting with compatible apps or staking DOT instantly. Here’s a straightforward 4-step guide to help you get started:
- Go to the Polkawallet website.
- Click on ‘Download Wallet’ and install the app on your device.
- Create your account and securely save your seed phrase.
- Transfer tokens to your Polkadot address, and you’re ready to explore!
Is Polkawallet Safe for Polkadot?
Yes, Polkawallet is a highly reputable Polkadot wallet, backed by notable crypto venture capital firms, including Web3 Foundation, Parity Technologies, and others. Being open-source, its code is accessible to everyone for examination, ensuring there are no security loopholes. This transparency contributes to its credibility within the crypto community.
About Polkadot
Polkadot is a groundbreaking multi-chain platform, designed to enable diverse blockchains to interconnect while sharing a common security model. Conceived by Ethereum co-founder Dr. Gavin Wood, Polkadot facilitates the transfer of any data or asset, not just tokens, across its network, thereby creating a versatile environment for various applications.
The Polkadot network comprises a primary network, the Relay Chain, and several customizable parachains optimized for specific tasks. It employs a Nominated Proof-of-Stake (NPoS) consensus mechanism for security and validation. The platform’s native token, DOT, plays a crucial role in network governance, staking, and bonding.
Bottom Line
In conclusion, while it is not possible to add Polkadot to MetaMask due to the fundamental differences in their blockchain technologies, alternatives such as Polkawallet provide a safe and user-friendly solution. Polkawallet, supported by reputable entities like the Web3 Foundation, offers a seamless connection to the Polkadot Relay Chain, enabling immediate interaction with compatible apps and staking of DOT. Its open-source nature and endorsement by significant crypto venture capital firms further enhance its credibility.
Как добавить сеть полкадот в метамаск
Metamask поддерживает несколько сетей блокчейн, включая:
- Ethereum: Это основная сеть Ethereum, которая поддерживает основные криптовалюты, такие как Ether (ETH) и ERC-20 токены.
- Rinkeby: Это тестовая сеть Ethereum, которая позволяет пользователям проводить тестовые транзакции без необходимости использования реальных средств.
- Ropsten: Это ещё одна тестовая сеть Ethereum, используемая для разработки и тестирования децентрализованных приложений (DApps).
- Kovan: Kovan также является тестовой сетью Ethereum, используемой для разработки и тестирования.
- Binance Smart Chain (BSC): Metamask также поддерживает Binance Smart Chain, блокчейн, разработанный Binance, который поддерживает криптовалюты и DApps, совместимые с Ethereum.
- Polygon (MATIC): Metamask поддерживает Polygon (ранее известную как Matic Network), которая является масштабируемым блокчейном для выполнения децентрализованных приложений.
Кроме того, Metamask может быть настроен для поддержки других сетей блокчейн, путем добавления пользовательских RPC (Remote Procedure Call) узлов или использования других дополнительных расширений и плагинов.
При использовании Metamask важно обратить внимание на то, какую сеть вы выбираете перед отправкой транзакций или взаимодействием с DApps, чтобы убедиться, что вы работаете с правильной сетью и активами.
Как в Метамаске переводить токены между сетями
В Metamask вы можете переводить токены между различными сетями, используя мосты (bridges) или мультичейн-протоколы. Вот общий процесс для перевода токенов между сетями:
- Откройте Metamask расширение или приложение на вашем устройстве.
- Убедитесь, что вы находитесь в сети, из которой вы хотите отправить токены. Например, если вы хотите отправить токены Ethereum на Binance Smart Chain (BSC), выберите Ethereum в качестве активной сети в Metamask.
- Убедитесь, что у вас достаточно средств для оплаты комиссии за транзакцию в сети отправителя. Комиссия обычно выплачивается в Ether (ETH).
- Найдите и выберите функцию «Отправить» или «Send» в Metamask.
- Введите адрес получателя, куда вы хотите отправить токены.
- Введите количество токенов, которые вы хотите отправить.
- Выберите токен, который вы хотите отправить, из выпадающего списка активов в Metamask.
- Возможно, вам потребуется ввести дополнительные данные, в зависимости от типа моста или протокола, используемого для перевода токенов между сетями. Например, для перевода токенов с Ethereum на Binance Smart Chain, вам может потребоваться ввести адрес контракта моста (bridge contract address) или выполнить дополнительные шаги аутентификации.
- Проверьте все данные транзакции, включая адрес получателя и количество токенов, и удостоверьтесь, что они верны.
- Нажмите «Подтвердить» или «Отправить», чтобы отправить транзакцию.
- Дождитесь подтверждения транзакции в сети отправителя.
- После подтверждения транзакции в сети отправителя, токены должны быть переведены на указанный вами адрес в целевой сети. В этой сети вы должны выбрать соответствующую сеть в Metamask, чтобы увидеть токены.
Важно отметить, что процесс перевода токенов между сетями может различаться в зависимости от конкретного моста или протокола, используемого для перевода. Обратитесь к документации или инструкциям, предоставленным соответствующим мостом или протоколом, чтобы получить более подробные инструкции для конкретного перевода.
Как добавить биткоин в Метамаск
Metamask является кошельком для Ethereum и ERC-20 токенов, поэтому он не поддерживает прямое добавление Bitcoin (BTC) в свой интерфейс. Однако, вы можете использовать Metamask для работы с Bitcoin, используя сторонние сервисы и мосты. Вот несколько способов, как можно работать с Bitcoin в Metamask:
- Wrapped Bitcoin (WBTC): WBTC — это ERC-20 токен, связанный с Bitcoin. Вы можете обменять свои наличные Bitcoin на WBTC на поддерживаемых биржах и потом отправить их на свой адрес Ethereum в Metamask. WBTC будет отображаться в Metamask как ERC-20 токен и вы сможете им торговать или использовать в DApps, поддерживающих ERC-20 токены.
- Atomic Wallet: Atomic Wallet — это мульти-валютный кошелек, который поддерживает как Bitcoin, так и Ethereum. Вы можете импортировать свой кошелек Metamask в Atomic Wallet и использовать его для хранения и управления своими Bitcoin вместе с Ethereum.
- Децентрализованные биржи (DEX): Вы можете использовать децентрализованные биржи, такие как Uniswap или SushiSwap, для обмена WBTC на другие токены или стабильные монеты, поддерживаемые на Ethereum. Переведите WBTC из своего Bitcoin кошелька на Ethereum адрес Metamask, а затем обменяйте его на желаемые активы на децентрализованной бирже.
- Мосты: Существуют также мосты, которые позволяют перемещать Bitcoin между сетью Bitcoin и Ethereum. Некоторые популярные мосты включают RenVM и WBTC. Вы можете использовать эти мосты для обмена своих Bitcoin на WBTC, который можно использовать в Metamask.
В любом случае, перед использованием любого стороннего сервиса или моста, убедитесь, что вы понимаете и доверяете этому сервису, и следуйте инструкциям, предоставляемым ими, для добавления Bitcoin в Metamask или использования Bitcoin в сети Ethereum.
Как настроить сеть BNB в Метамаск
Для настройки сети Binance Smart Chain (BSC) в Metamask, выполните следующие шаги:
- Установите и откройте расширение Metamask в вашем браузере.
- В верхней правой части окна Metamask нажмите на иконку сети, которая обычно представлена значком Ethereum.
- В появившемся окне выберите «Сети».
- Прокрутите вниз и нажмите на «Добавить сеть».
- Заполните следующие поля:
- Сетевое название: Binance Smart Chain
- RPC-URL: https://bsc-dataseed1.binance.org/ (или другой RPC-URL, если он изменился)
- Цепочка ID: 56
- Символ валюты: BNB
- Количество десятичных знаков: 18
- Нажмите «Сохранить».
- Теперь вы должны видеть новую сеть «Binance Smart Chain» в списке доступных сетей Metamask.
- Щелкните на иконке сети в верхней правой части окна Metamask и выберите «Binance Smart Chain» в качестве активной сети.
После настройки сети Binance Smart Chain в Metamask вы сможете видеть BNB и другие токены, работающие на этой сети, а также взаимодействовать с DApps и осуществлять транзакции в этой сети.
Обратите внимание, что при работе с Binance Smart Chain в Metamask вам все равно нужно иметь некоторое количество BNB для оплаты комиссий за транзакции и других операций в сети.
Как настроить полигон в Метамаск
Для настройки сети Polygon (ранее известной как Matic Network) в Metamask, выполните следующие шаги:
- Установите и откройте расширение Metamask в вашем браузере.
- В верхней правой части окна Metamask нажмите на иконку сети, которая обычно представлена значком Ethereum.
- В появившемся окне выберите «Сети».
- Прокрутите вниз и нажмите на «Добавить сеть».
- Заполните следующие поля:
- Сетевое название: Polygon
- RPC-URL: https://rpc-mainnet.matic.network (или другой RPC-URL, если он изменился)
- Цепочка ID: 137
- Символ валюты: MATIC
- Количество десятичных знаков: 18
- Нажмите «Сохранить».
- Теперь вы должны видеть новую сеть «Polygon» в списке доступных сетей Metamask.
- Щелкните на иконке сети в верхней правой части окна Metamask и выберите «Polygon» в качестве активной сети.
После настройки сети Polygon в Metamask вы сможете видеть MATIC и другие токены, работающие на этой сети, а также взаимодействовать с DApps и осуществлять транзакции в этой сети.
Обратите внимание, что при работе с Polygon в Metamask вам все равно нужно иметь некоторое количество MATIC для оплаты комиссий за транзакции и других операций в сети.
Как добавить сеть trc20 в Метамаск
Metamask не поддерживает напрямую добавление сети TRC20 (TRON) в свой интерфейс. Однако, вы можете использовать кастомные RPC-URL и токенный адрес для взаимодействия с сетью TRON в Metamask. Вот как это сделать:
- Установите и откройте расширение Metamask в вашем браузере.
- В верхней правой части окна Metamask нажмите на иконку сети, которая обычно представлена значком Ethereum.
- В появившемся окне выберите «Сети».
- Прокрутите вниз и нажмите на «Добавить сеть».
- Заполните следующие поля:
- Сетевое название: TRON
- RPC-URL: https://api.trongrid.io (или другой RPC-URL, если он изменился)
- Цепочка ID: 1
- Символ валюты: TRX
- Количество десятичных знаков: 6
- Нажмите «Сохранить«.
Теперь вы должны видеть новую сеть «TRON» в списке доступных сетей Metamask. Однако, чтобы работать с токенами TRC20 в Metamask, вам необходимо добавить их вручную.
- Нажмите на значок Metamask в правом верхнем углу и выберите «Активы».
- Прокрутите вниз и нажмите на «Добавить токен».
- Введите адрес контракта для нужного токена TRC20, символ и количество десятичных знаков.
- Нажмите «Добавить» и токен TRC20 будет добавлен в ваш список активов Metamask.
Теперь вы сможете видеть и управлять токенами TRC20 в Metamask и использовать их для отправки и получения средств, а также для взаимодействия с DApps, работающими на сети TRON.
Обратите внимание, что при работе с TRON в Metamask вам все равно нужно иметь некоторое количество TRX для оплаты комиссий за транзакции и других операций в сети.