How to Manage Multiple Wallets with MetaMask
If you’re new to Web3, you might still be getting used to using MetaMask and managing your new online identity and assets.
by MetaMask July 12, 2022
If you’re new to Web3, you might still be getting used to using MetaMask and managing your new online identity and assets. But if you’ve been around a while, you may be juggling several different Secret Recovery Phrases. That can get complicated, but there are ways to make it easier from a usage perspective. Let’s take a dive into how to manage multiple wallets without losing your mind.
But why?
Why would you want, or need, multiple Secret Recovery Phrases? After all, each SRP can generate a near-infinite number of accounts, so you can just organize your tokens and assets at the account level, right?
Well, there are actually a lot of potential use cases and avantages. First of all, if your SRP becomes somehow compromised, all the accounts generated using that SRP are compromised. Some users who are interested in engaging with cutting-edge, unproven dapps and platforms prefer to have their riskier behavior ‘sandboxed’ in a separate wallet.
Another reason to employ multiple SRPs is so that you can have a ‘public’ identity as well as more anonymous identities; if you want to try out a platform without associating it publicly through on-chain data with your publicly-known identity, an alternate SRP is a straightforward way to do it.
Another common scenario is that of entrepreneurs or businesspeople; they may have personal wallets and business wallets. It is, of course, good business practice to keep these separate. However, there’s a practical side to it as well: if you need to report your crypto holdings to tax agencies, it’s much more convenient to have a separate SRP for each taxable entity.
Last but not least: some people have several different versions of MetaMask installed at the same time. A developer may be working with a custom build they’ve created themselves, or making beautiful new functionality for MetaMask in our developers’ distribution, Flask. An institutional investor may be working with our enterprise-tailored MetaMask Institutional, perhaps with several different wallets. Developers often have SRPs specifically for development, which they use to deploy smart contracts. Under these circumstances, you have to be very careful to have only one version of MetaMask active in the same browser at the same time, or it won’t work.
These are some of the most common scenarios, and this list is by no means exhaustive. So enough about the why; how do these crypto-connoisseurs manage it all?
Secret Recovery Phrase hygiene and safety
The first step to managing any Web3 identity is to practice good SRP hygiene and safety. This is what we mean:
- “Not your keys, not your coins”: the old Bitcoin maxim holds true on other blockchains, as well. Never, ever, ever share your Secret Recovery Phrase. Anyone who has that phrase has complete and irrevocable control over the accounts generated with it. Never share it–especially if they say they’re trying to help.
- Secure backups: If those twelve words represent total control over your accounts, how do you keep them safe and accessible at the same time? We’ve got a whole article on SRP security, but these points bear repeating:
DO:
- Write down your Secret Recovery Phrase somewhere safe
- Double-check your spelling and that you wrote down every word in the same order they were given
- Reach out to MetaMask Support’s official channels if you need help
DON’T:
- Keep it in an easily discovered location; e.g. in a cloud-saved document or email titled «Seed Phrase»; on a post-it note stuck to your computer.
- Provide your seed phrase to anyone, even if they say they’re from MetaMask Support
- Change the order of the words
Additional Considerations:
- Consider getting a hardware wallet. This adds a layer of complexity to your SRP management, so if you’re thinking about it, read our hardware wallet configuration recommendations here.
- Lastly: if a sidechain (like Ronin, for example) requires you to set up a new wallet, consider whether you want to re-use an existing SRP, or generate a new one. Pro tip: it would be safer to generate a new one.
Follow these guidelines, and you’re well on your way to staying safe in Web3.
So without further ado: how do I hold all these SRPs??

There are two main ways to do it: use different browsers, or set up different browser profiles. Don’t worry, it’s fairly easy.
Using different browsers
This option is as straightforward as it sounds: if you’ve only got two or three SRPs, then you can simply install MetaMask in several different browsers, and use a different browser for each one. Given the open-source nature of the modern web, there’s not a definitive listing of browsers that it will or won’t work in. The browsers officially supported by MetaMask at press time are Chrome, Firefox, Brave, and Edge.
Using browser profiles
The easiest way to manage multiple wallets is by using browser profiles. Let’s take a look at how these work with MetaMask in Chrome, as so many browsers are based on it. Chrome’s canonical instructions are available here, and the steps are fairly simple:
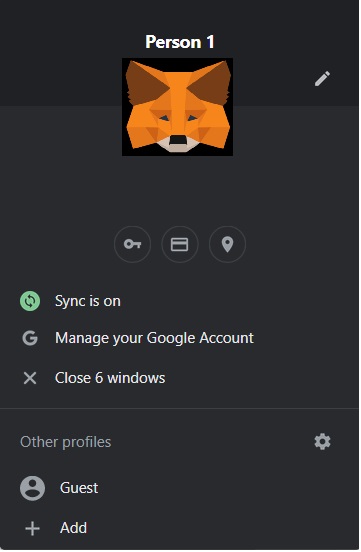
- In the top-right corner of your browser, click the profile image (it will have your Google profile image, or if you haven’t logged in, it will have a placeholder image)
- Under that menu, at the bottom, click on ‘add’:
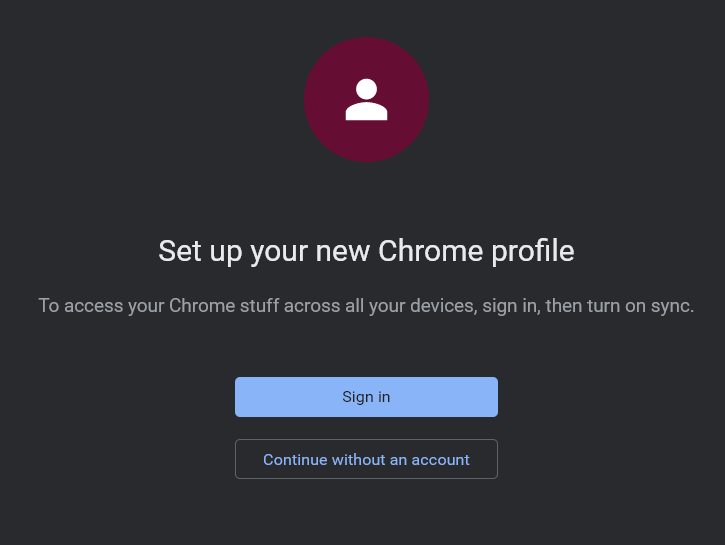
- Walk through the prompts to create the new profile; you probably don’t need to associate it with another email account, so you can just click ‘Continue without an account’:
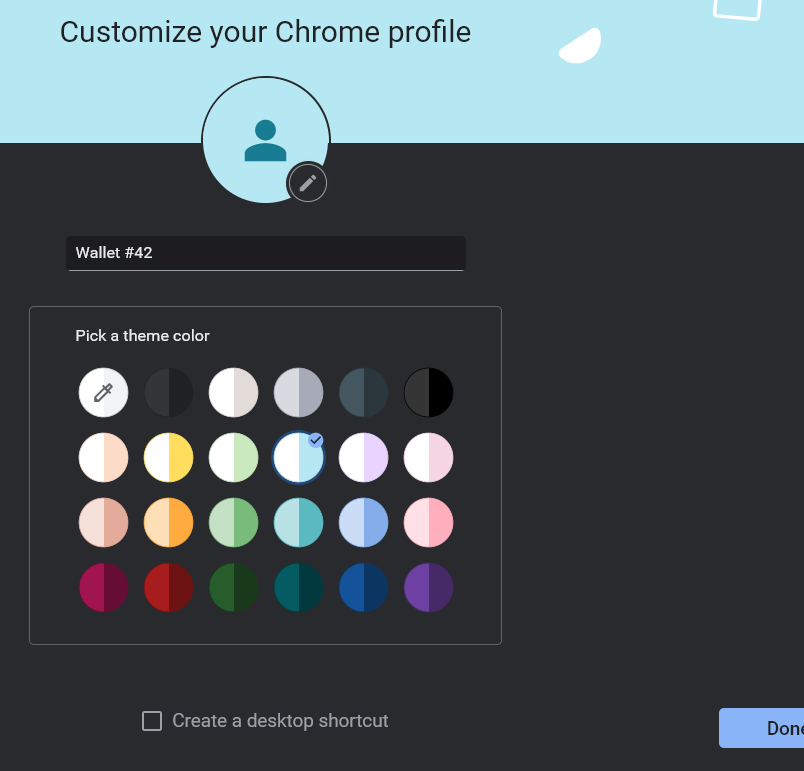
- Choose a color scheme, give your profile a name that reminds you which wallet you’re going to use with it, and hit done:
Now all that’s left to do is to open a browser window in that new profile, install MetaMask from our downloads page like you normally would, and follow these instructions to restore from your SRP–or create a new one.
This will allow you to juggle between wallets with ease, as you can have multiple browser windows open, each one in a different profile, at the same time.
Keep in mind that while MetaMask’s team is at the forefront of open source security practices and works tirelessly to keep our users safe, you’re only as safe as your computer is. Be careful not to interact with malware, and be sure to read how to enable full-disk encryption: the more SRPs you have on one machine, the more you have to lose!
Как создать несколько кошельков метамаск
Да, вы можете иметь несколько кошельков в приложении MetaMask. MetaMask позволяет создавать и управлять несколькими кошельками на основе одной учетной записи. Это может быть полезно, если вы хотите разделять различные активы или использовать отдельные кошельки для разных целей.
Для создания нового кошелька в MetaMask следуйте этим шагам:
- Откройте MetaMask и войдите в свою учетную запись, если вы еще не вошли.
- В правом верхнем углу нажмите на свою иконку профиля.
- В выпадающем меню выберите «Создать новый кошелек».
- Введите пароль для нового кошелька и нажмите «Создать».
- Вам будет предложено сохранить свою фразу восстановления (seed phrase). Обязательно сохраните эту фразу в надежном и безопасном месте. Она позволит вам восстановить доступ к кошельку, если вы потеряете его или забудете пароль.
- После сохранения фразы восстановления вам будет предложено подтвердить ее, выбрав правильные слова из списка.
- После успешного подтверждения фразы восстановления ваш новый кошелек будет создан и готов к использованию.
Вы также можете импортировать существующий кошелек в MetaMask, если у вас уже есть его фраза восстановления или приватный ключ.
Чтобы переключаться между кошельками в MetaMask, просто выберите нужный кошелек из выпадающего меню профиля в правом верхнем углу.
Помните, что сохранность ваших фраз восстановления и приватных ключей является важным аспектом безопасности. Убедитесь, что вы храните их в надежном и защищенном месте.
Как создать несколько кошельков метамаск
MetaMask — это популярное расширение для браузера, которое позволяет пользователям управлять своими криптовалютными кошельками. В этой статье мы расскажем, как создать еще один кошелек в MetaMask.
Шаг 1: Установка MetaMask
Прежде чем начать, убедитесь, что вы установили MetaMask расширение для своего браузера. Вы можете найти его в магазине расширений вашего браузера.
Шаг 2: Вход в MetaMask
Откройте MetaMask, нажмите на значок расширения в панели инструментов вашего браузера и выберите «Запустить». Если у вас уже есть существующий кошелек, введите свою секретную фразу в соответствующее поле и нажмите «Восстановить». Если у вас еще нет кошелька, нажмите «Создать новый кошелек».
Шаг 3: Создание нового кошелька
Введите пароль для вашего нового кошелька и нажмите «Создать». Убедитесь, что пароль сложный и надежный, чтобы обеспечить защиту ваших активов.
Шаг 4: Резервное копирование секретной фразы
После создания нового кошелька вам будет предложено создать резервную копию секретной фразы. Секретная фраза — это набор слов, который позволяет восстановить ваш кошелек в случае потери доступа к нему. Обязательно запишите эту фразу в надежном месте и не раскрывайте ее никому.
Шаг 5: Добавление нового кошелька
Чтобы добавить новый кошелек в MetaMask, нажмите на кнопку «Добавить кошелек» и выберите «Импорт кошелька». Введите вашу секретную фразу в соответствующее поле и нажмите «Импортировать». Теперь вы можете использовать новый кошелек в MetaMask.
Заключение
Теперь вы знаете, как создать еще один кошелек в MetaMask. Помните, что безопасность вашего кошелька — это ваша ответственность. Берегите свои секретные фразы и следите за актуальными рекомендациями по обеспечению безопасности криптовалюты.
How to Add Multiple Accounts to MetaMask In 2023
If you want to add multiple accounts to MetaMask you’re not alone. Adding another account to your wallet can be done in four simple steps and only takes seconds.
Below I’ll walk you through the exact steps and explain the various benefits of doing so. Let’s go!
How to Add Multiple Accounts to MetaMask
1. Sign in to MetaMask

The first thing you need to do is sign in to your existing MetaMask wallet.
2. Tap the favicon in the top-right of your wallet

Next, you’ll want to tap the favicon (the colorful circle) in the top-right corner of your wallet profile.
3. Tap “Create account”

This will bring up a few different options. You want to click on the “Create account” button. You’ll notice in the image above I’ve already created an additional account named “hey”.
You can edit your account name by tapping the three dots in the right-hand corner, choosing “Account details”, then tapping the pencil icon to edit the name.
It’s important to note that once you create an account there’s no way to delete it. It will forever be associated with your wallet.
4. Enter your account name and tap “Create”

Lastly, input your account name and tap create. Your new account will automatically be added to your wallet.

To switch between accounts in your wallet simply tap your account favicon and choose the account you want to use.
Also, if you have more than two accounts you’ll have to use the arrow to view the others as MetaMask only displays two at a time.
Every time you create a new account you should always record its private key and store it in a secure location (not online).

To view your newly created account’s private key tap the three dots, choose “Account details”, tap “Export private key”, then enter your wallet’s password to reveal it.
You will need this key if you want to import the account later, as extra accounts you create in MetaMask might not automatically appear in your wallet if you have to recover it using your seed phrase at a later time.
Does Each MetaMask Account Have Its Own Seed Phrase?
If you create a new MetaMask account in your wallet it does not generate a new seed phrase. Each additional account receives its own private key, however, which is different than your wallet’s seed phrase.
Your seed phrase (or secret recovery phrase) is the key to your entire crypto wallet. You only receive a new seed phrase if you create an entirely new MetaMask wallet.
A private key is a key to your individual account.
That means if you were to lose your wallet’s seed phrase you’d also lose access to all your accounts.
Are Multiple Accounts In MetaMask Different Wallets?
Creating multiple accounts in MetaMask is not the same as creating a new wallet. You can create as many accounts as you want but they will all still share the same seed phrase. If you want a new wallet you’ll have to start over and let MetaMask generate a new seed phrase for you.
How to Create a Second MetaMask Wallet
- Go to MetaMask.io.
- Download the extension or app.
- Tap “Create a Wallet”.
- Record and store your new seed phrase.
Why Have Multiple MetaMask Accounts?
Creating multiple accounts in your MetaMask wallet protects your assets in case of a scam or hack. If you sign a malicious transaction using Account 1, only the assets in that account can be compromised while the other accounts remain secure.
That’s why a majority of users create several accounts, as it reduces the likelihood of all their assets being stolen in case something bad does happen.
Again, this is only true if the account you’re using is hacked. If your entire wallet is hacked (someone gets a hold of your seed phrase), then none of your accounts are safe since your seed phrase enables access to every account in your wallet.
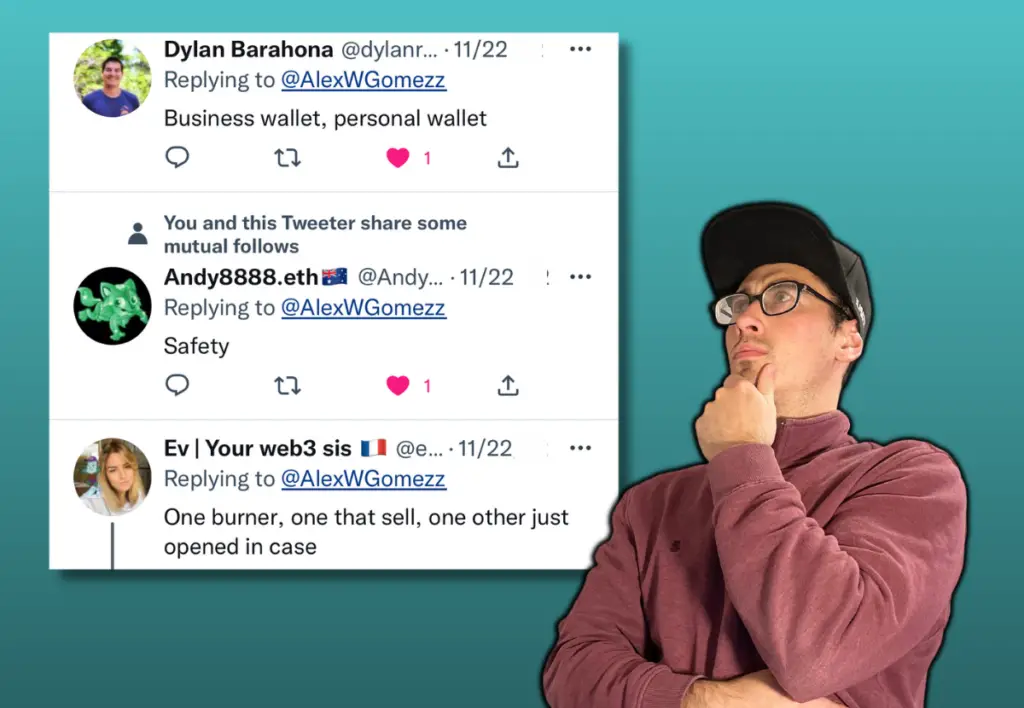
I even asked some of my friends on Twitter why they use multiple MetaMask accounts—here’s what they said.
- Safety.
- One for business, one for personal use.
- One burner, one to sell assets, and one as a backup.
- Vault storing different projects (asset diversification).
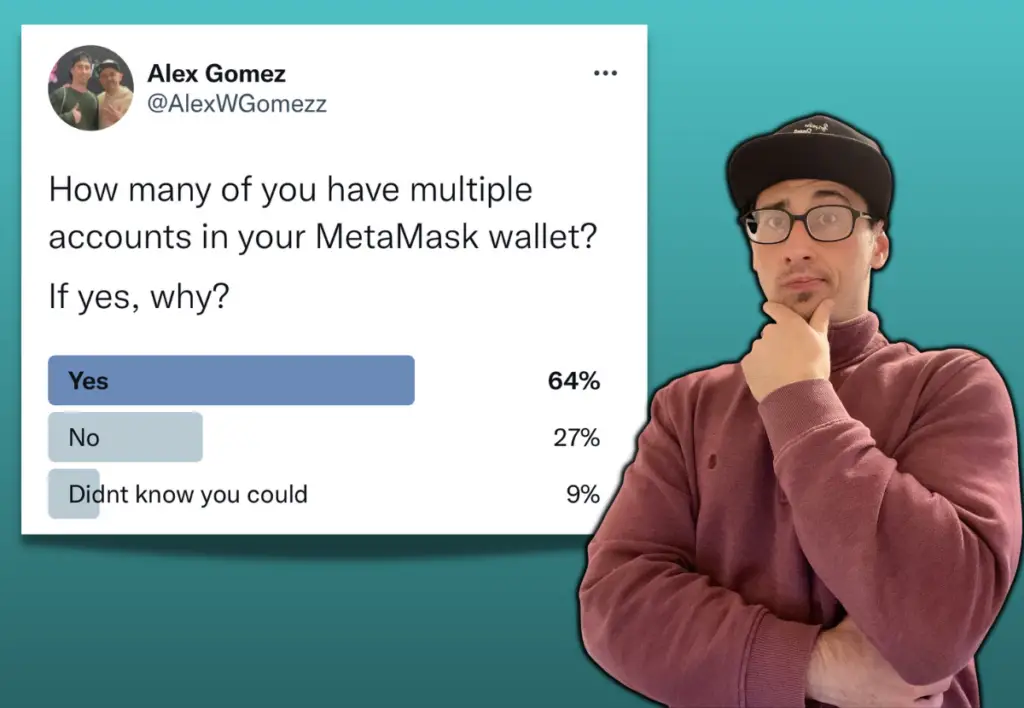
Furthermore, I took a poll to see how many people utilized more than one account.
Out of the 22 individuals who voted, the results were mixed. 64% of users have multiple accounts, 27% don’t, and 9% didn’t know you could create numerous accounts.
The moral of the story is that if you use MetaMask to store digital assets like NFTs and crypto, you should consider creating more than one account to diversify your holdings.
Especially if you’re unaware of the common MetaMask hacks and how to secure your wallet from hackers.
How to Add Missing Accounts Into MetaMask
If you completely log out of MetaMask, such as when you delete the app or extension, you can only regain access by entering your secret recovery phrase. The only problem is that certain accounts won’t appear. Rather, you have to import them manually.
MetaMask will attempt to add your additional accounts (assuming they weren’t imported) by checking your previous accounts in ascending order (i.e. Account 2, then Account 3).
MetaMask will only add the account automatically if they have a non-zero ETH balance. However, this process ends when MetaMask encounters an account with 0 ETH; any accounts beyond that won’t be added.
Notably, this process only checks for balances of ETH on Ethereum mainnet. This means other tokens or tokens on other networks will not result in your accounts being automatically re-added.
- Tap the favicon on the top right corner of the MetaMask dropdown menu.
- Tap “Create Account” to restore your MetaMask accounts in the order they were created.
- If your account had a specific name you can name it again before clicking “Create”.
If your account doesn’t appear after completing the steps above, it’s likely that it was created with a different secret recovery phrase or you need to import it using its private key.
How to Import an Account Using Its Private Key
To import a MetaMask account you will need the account’s private key.

1. Tap the favicon icon
Begin by tapping the favicon icon in the wallet of which you want to import the account.
2. Select “Import Account”
Under the dropdown menu, select “Import Account”.
3. Paste your private key and tap “Import”
Paste the account’s private key string into the field and then tap “Import”.
The account will automatically appear in your wallet’s list of accounts with an “Imported” badge next to it.